A microwave is one of the first kitchen appliances that people consider when they’re planning on moving to a new place, thanks to its versatility and ease of use.
Luckily, microwaves are usually boxy, which makes the process of packing and transporting a microwave a fairly simple one.
If you want to know how to pack a microwave for moving, you’ve come to the right place! Read on for a brief guide that will walk you through everything you need to know to safely pack your microwave.
Table of Contents
Step 1: Get Necessary Supplies to Pack Your Microwave
The first thing you need to do to pack a microwave is to get all the necessary packing materials for the job. Of course, the best case scenario here is that you kept the original packaging of the microwave. If that’s the case, you don’t need to buy a special moving box or wrapping material.
However, if you don’t have the same box it came in (and let’s be honest, most of us won’t), here’s what you need to get your microwave to your new place safely.
Start by measuring the dimensions of your microwave and look for a corrugated moving box that is 2 to 3 inches larger across all dimensions. You don’t want the box to be too large to prevent the microwave from shifting around while packed.
In addition to the right box, you want to get a roll of plastic wrap and packing paper in addition to packing tape for security.
Step 2: Prepare the Microwave for Packing

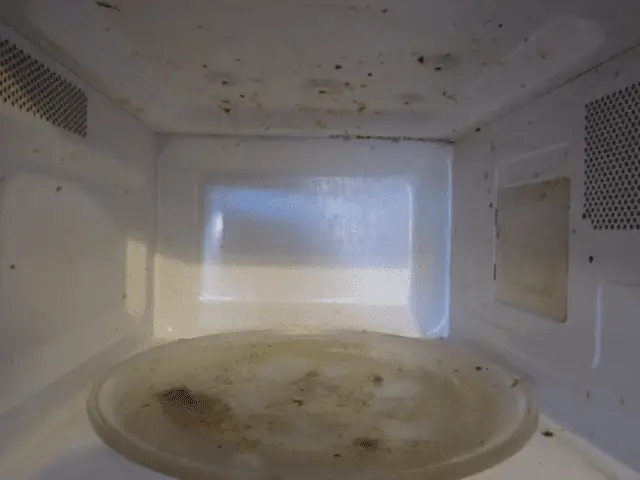
The first thing you need to do before packing away your microwave oven is clean it!
This actually comes with a lot of advantages that can benefit you while moving your microwave. For starters, a cleaner exterior will protect the integrity of your box and packing material.
Additionally, keeping the interior part of the microwave (including that spinning glass tray) clean will protect it from damage and allow you to utilize that space while moving.
Plus, moving a dirty microwave with food residue still coating the inside is just gross!
To clean up your microwave, you should do the following:
- Fill a microwave safe bowl halfway with tap water.
- Add some freshly squeezed lemon juice from two halves of lemon in the water.
- Microwave the bowl for about 1 to 2 minutes or until the water evaporates.
- Turn the microwave off and remove the bowl.
- Wipe the interior of the microwave with a damp cloth or a sponge.
- Remove the glass tray in the bottom, and scrub it with dish soap and warm water.
- Wipe the exterior with another dry rag or cloth until completely dry.
You can also check the instructions provided in your microwave’s manual on how to clean it up properly.
Step 3: Wrap and Pack All the Removable Parts Separately
Keeping the glass plate or any accessories that comes with the microwave oven inside while moving can damage its interior or shatter the plate. For that reason, you should pack these items in a separate box.
To do that, take out all removable accessories that come with the microwave and wrap them separately in bubble wrap.
After that, secure all the accessories together by covering them with plastic wrap, then store them in a suitable-sized box.
Step 4: Secure the Power Cord
Turn off your microwave and unplug its power cord in order to secure it properly, which prevents the prongs from damaging the wrapping material later on.
Start rolling the power cord so that it forms a small spool, and prevent it from unraveling by securing it with some tape or a plastic zip tie. Leave a few inches of the power cord base free to let you move it around and find the perfect spot to attach it.
Ideally, the microwave will have a spot to store the power cord, but if it doesn’t, fix it on one of the microwave sides using some tape.
Step 5: Seal the Microwave with Wrapping Material
Now that the microwave is ready for wrapping, unroll your wrapping material (preferable paper packing or bubble wrap.
Roll the wrapping material around your microwave so that the bubble wrap is surrounding the microwave from all directions.
You can start by rolling it side to side for several rounds then go vertical for a couple more, then cut and secure the wrapping material with tape so that it doesn’t go loose.
Step 6: Finalize the Packing and Seal the Box
Open the corrugated box and line it up with some crumpled packing paper or old newspaper, then place your sealed microwave inside so that it sits upright.
If you don’t have enough crumpled paper, you can also use clean towels and rags to do the same job.
Continue adding more packing material in the empty space left between the microwave and the box (on the sides on top of the microwave) to prevent it from shifting inside and absorb any shocks that could damage the microwave.
Close the flaps of the box properly and make sure that nothing is sticking out of the box. If it does, open the box and remove some of the excess crumpled paper then try again.
When the box closes smoothly, seal the flaps with a couple overlapping strips of packing tape. You don’t have to go nuts with the tape here. I’ve personally found that a moving box and one strip of packing tape can hold over 100 pounds.
Step 7: Label the Microwave Box Properly

Lastly, remember to label your box properly so you can easily be identified in your new place.
To remind yourself to handle the box properly, you can stick a “fragile” sticker on the box or draw an upright arrow to remind yourself of the right orientation while carrying the box.
Now your microwave oven is ready to be loaded up onto the moving truck and start heading to it’s new kitchen!
Wrap Up
With that said, you know all the necessary steps and tips in order to pack a microwave for moving!
As you can see, the process is fairly easy and gets even easier if you have the original box of the microwave.
Remember to clean your microwave prior to packing it in a box because it might take you some time before you open the packages in your new place and it allows you to utilize the interior space of a microwave for moving small unbreakable items.
Find this article helpful? We also have more tips on how to move some of your other small kitchen appliances.


