While your blankets aren’t fragile, these are the blankets you snuggle into every night and you want to make sure they’re packed right. For instance, they may get dirty or damaged if packed incorrectly.
Packing blankets may even seem daunting just because of how much space they may take up in your closet. But, in reality, it may be the easiest part of the entire packing and moving process.
You just need to invest in the right packing material and follow a plan to ensure your blankets arrive clean, undamaged, and ready-for-use.
This article gives you a step-by-step guide to show you how to pack blankets for moving.
Step 1: Declutter Your Blankets

Moving from one home to another should allow you to declutter your belongings, including your blankets.
I think we’re all guilty of having at least one or two blankets that have been sitting a closet for years. Now is the perfect time to actually get rid of them. Any blankets that are too small, moth-eaten, stretched, itchy, frayed, pilled, or tattered should be disposed of.
You can recycle or donate them.
Decluttering your blankets can spare you the trouble of packing and moving them.
In addition, this allows you to get brand new blankets that match the decor of your new home.
Having said all that, there is one last use you can get out of your old blankets that is one of our favorite moving hacks. You can set aside a couple to provide cushioning for fragile items during the moving process.
Old blankets can provide great cushion and serve as great filler to take up empty space in boxes which can help secure items in place. Best of all, they’re free.
Step 2: Get Your Blankets Dry-Cleaned
Before you start packing your blankets, you should take them to your dry cleaners—even if you regularly wash your blankets and have rarely used them.
Getting your blankets dry-cleaned makes sure that no dust or dirt is clinging to them. It also prevents permanent stains and discoloration.
Dry-cleaning also gets rid of sweat and natural odors. This is crucial because these existing odors will intensify when you pack your blankets in an airtight container.
What’s more, you can avoid a bug infestation by dry-cleaning your blankets. Large and small insects are drawn to unclean clothing and linen. Bugs like moths, crickets, and silverfish can eat through your blankets, leave stains, and even lay larvas. Yuck!
Professional dry-cleaning can get rid of any bugs and their eggs from your blankets. It can also ensure that the blankets remain bug-free during the moving process.
In fact, you should have all of your linen and bedding dry-cleaned before packing. This way, you can ensure that everything in your new home is fresh and clean.
Step 3: Prepare the Packing Material

Preparing the right packing materials for your blankets can ensure that your clean blankets arrive at their new home still clean and undamaged.
Here’s what you’ll need (see everything we recommend in our Moving Supplies Buying Guide):
- Large corrugated boxes
- Plastic wrap or vacuum storage bags
- Packing paper
- Packing tape
- Permanent marker
You should use brand new materials if at all possible. Old or second-hand materials may transfer any smelly or musty odors to your blankets.
It can be counterproductive to pack your blankets in old, smelly boxes after going through the trouble of dry-cleaning them.
Step 4: Pack the Blankets
Following a precise plan can help speed up and ease the process of packing blankets.
You should start by lining the corrugated boxes with packing paper. This can prevent insects or moisture from seeping into the box.
One at a time, take your blankets and lay them on a flat surface. Then, fold each one to a fourth of its size—depending on the thickness.
The next step depends on whether you’ll use plastic wrap or vacuum storage bags.
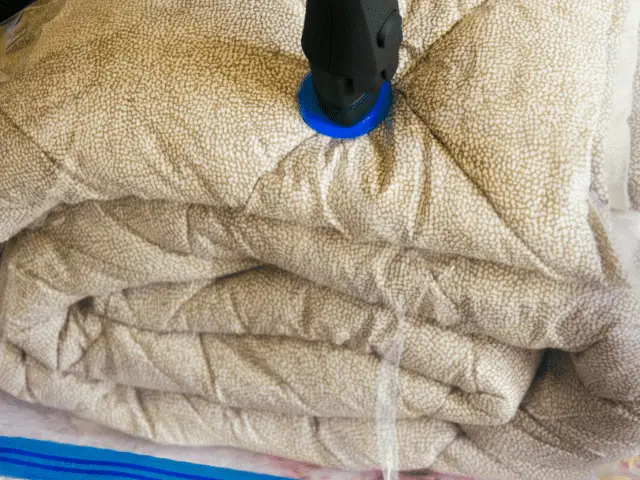
If you’re using plastic, then wrap each blanket carefully. As for the vacuum storage bags, you should place one or more blankets inside, depending on the bag’s size.
After you close the storage bags, suck the air out of them using a vacuum. The advantage to using vacuum storage bags is that they shrink to the volume of your blankets, which gives you more space inside the packing boxes.
Whether you wrap your blankets in plastic wrap or pack them in vacuum storage bags, they’ll be protected from dust and moisture. Then, you should compress out any air and seal the blankets properly.
Finally, place the blankets inside the packing boxes and secure them with packing tape. You can use a permanent marker to label the boxes with the number of blankets in each box or other information.
It’s worth noting again that the packed blankets can provide protection for any fragile items. You can divide the blankets among the packing boxes to have a blanket in each box, for example. Just make sure to line the boxes with packing paper.
You can lay a blanket at the bottom of a box, then place your fragile items on top, followed by another blanket.
For example, I like to collect shot glasses when we travel and have accumulated a pretty decent collection. This method of layering blankets to protect fragile items is exactly how I pack my shot glasses when we move. Haven’t had a single broken glass yet.
In Conclusion
Keep in mind that your worst enemies when it comes to moving blankets—and bedding in general—are moisture and air. That’s why it’s essential to filter out any air out of the bags and boxes if possible.
You should also make a point of unpacking your blankets as soon as possible. You don’t want them to be in the plastic wrap for any longer than necessary. There’s also the fact that you’ll most likely need them for your first night’s sleep.


