You’ve set the date and the countdown has started! You’re all jittery with excitement! You’re moving to a new place and can’t wait to settle in and start your new life.
However, before you can do any of that, you have to do the daunting task of packing first. Generally speaking, the bedroom is usually one of the last rooms to be packed. You still have to sleep somewhere every night, right?
Many people feel that packing their bedroom is intimidating, to say the least. So, we decided to jump in and lend a hand.
In this post, you’ll find all the tips and tricks you need on how to pack up your bedroom for moving. Keep our guide handy and we’ll walk you through the entire process.
Let’s dive in.
Table of Contents
How to Pack Up Your Bedroom for Moving in 10 Easy Steps

Check out our no-fuss guide on how to pack up your bedroom for moving.
Step 1: Gather Your Packing Supplies
Below is a list of all the basic supplies you’ll need to pack all your bedroom belongings.
- Different sized boxes, including wardrobe and book boxes
- Styrofoam corner protectors or thick, corrugated cardboard sheets
- Bubble wrap, packing paper, tissue paper, and crumpled newspapers
- Packing and masking tape
- Paper for making lists of your belongings
- Black permanent marker and pen
- Tools to disassemble your bedroom furniture, such as a screwdriver and an Allen wrench
- Moving blankets and old sheets
For our complete guide on all the supplies we recommend for a move, check out our Moving Supplies Buying Guide.
Step 2: Declutter Your Bedroom
A week before the move, you have to start purging out your belongings, starting with your wardrobe. Getting rid of things you no longer need makes the whole move much easier.
Plus, it’ll empty up your closet for some new clothes once you’re in your new home. (It might even put a few bucks in your pocket!)
Make three piles to make the process more efficient:
- Keep
- Donate or sell
- Throw out
Step 3: Make a List

As you’re packing your belongings, write down the names of what you’re putting in the box. It could be specific items or just general ‘winter clothes’ for example.
Repeat this for each box. Then, once you’re done, tape the list on one of the inner flaps. It’ll make it easy to check what’s in each box without having to dig through the piles of stuff.
In case you’re wondering, yes, you’ll want to label the outside of the box too – we’ll cover that in a minute.
Step 4: Wrap Up Accessories
Any expensive jewelry should be wrapped in its pouch or boxes they came in. If you don’t have them any longer, you can use bubble wrap to keep them protected. Make sure you take them with you in your car to prevent them from getting misplaced, lost, or stolen.
Belts can easily be rolled up and placed in-between your clothes. Bags also can go between your clothes. Fill them up with rolled-up shirts or tissue paper so they don’t get bent or damaged.
As for hats, stuff them with tissue paper or crumpled up paper to keep their shape. Next, place them last in the packing box on top of your clothes to prevent them from getting crushed.
The same thing goes for your shoes. Keep them on top, preferably in their original box. If you don’t have the original boxes to pack your shoes, an alternative is to simply surround them with packing material and tape it in place.
Step 5: Pack Up Your Wardrobe
Before packing, set aside all items you’ll need the first couple of days after the move. This includes things like a few clothing items and toiletries. Place them in a clearly marked bag and keep them with you in the car so they don’t get misplaced.
Here are a few tricks to help keep your clothes safe during transit.
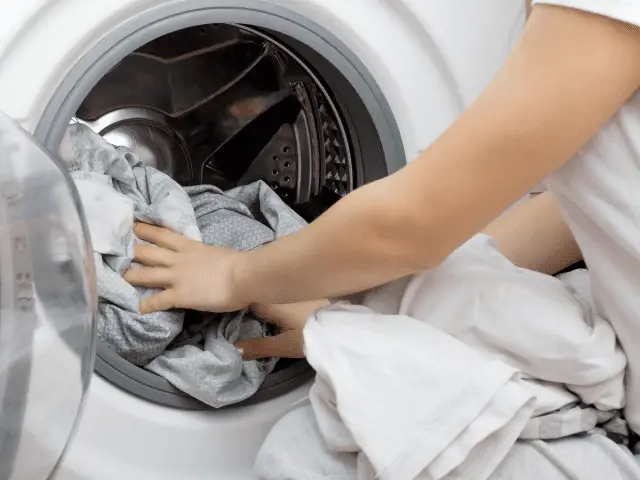
Wash Dirty Clothes Beforehand

You’re probably saying to yourself, “I have a thousand things to do, now isn’t the best time to run a load of laundry.”
Yet, trust us, you’ll be so glad you did when you get to your new place.
After moving, all you want to do is do a double blink and see all your stuff magically appear where it’s supposed to be. The last thing you want to do is wash your dirty clothes.
Use Wardrobe Boxes
Whoever invented wardrobe boxes deserves some kind of award! They save you so much time and energy both before and after the move.
You know the drill: you take your clothes off the hanger and waste precious time folding and packing. Then, if that weren’t enough, you’re left with is an inconvenient pile of hangers!
Wardrobe boxes put an end to all that! The best part is you don’t have to take any of your clothes off the hangers. You just put them straight into a wardrobe box, and you’re done!
Leave Clothes in Drawers
Another smart idea is to keep your clothes in your dresser drawers. Remove each drawer and secure it using tape or shrink wrap.
Once you’re settled in, remove the wrap. Slide in the drawer and you’re set!
Use T-Shirts as Padding
If you have lots of shirts, you can use them as padding in other boxes. If you have non-fragile items, roll up your T-shirts and place them in the empty spaces between them. It’ll help prevent them from shifting during the move.
Just make sure they’re things that won’t stain or ruin your clothes. Also, make a note of which box you placed your shirts in so you can easily find them after the move.
Step 6: Secure Fragile Items
Check out the following ways to pack all the fragile items in your bedroom.
Paintings/Posters
Do you have paintings or posters? Take them out from their frames or remove any adhesive materials. Then, roll them up and place them in cylindrical tubes to protect them during the move.
Breakables
How about vases? Photo frames? Mirrors? These are all fragile items that should be carefully wrapped in several layers of tissue paper or bubble wrap.
You can also cover them with moving blankets for maximum protection. Secure them with masking tape before placing them in boxes as close to the item’s dimensions as possible.
If the boxes are small, place several of them in one big one. Fill the extra spaces with packing material. You can also use Styrofoam corner protectors or thick pieces of cardboard to keep everything from sliding around.
For lamps, first, remove the bulb and the shade. If you want, you can even remove the wire around the bulb, knobs as the harp.
Wrap everything in a couple of sheets of bubble wrap. Add padding all around them to keep them from moving around in the box.
Books
Books should be placed in smaller boxes to reduce the weight. This may add extra boxes to your load, but it prevents any lifting injuries.
Step 7: Put Away Bedding

Pack up all the sheets, blankets, and duvets in suitcases or large boxes. You can also use them to line boxes to pad non-fragile items.
If you have time, wash and dry your linens and bedding before packing them up. It’ll save you a lot of time after the move.
The mattress is the biggest and hardest to pack. Nevertheless, the extra effort will be well worth it once you get to your new home.
If you still have the original packaging, then you have nothing to worry about! Simply slide it in and tape the box shut.
If you don’t, then you’ll have to improvise. Get a cardboard box with the same measurements as the mattress, wrap it around. Then, secure the cardboard in place with packing tape.
Step 8: Disassemble Furniture
Start by disassembling your bedframe. Use tape on the undersides of pieces to mark which piece is which so reassembling goes smooth. You can also take a picture of the whole frame and then each piece. That has come in very handy for us a time or two.
You can do the same for dressers, desks, and chairs. Dismantle each piece and put away all the small parts in a clearly marked bag.
Wrap each part in bubble wrap or old sheets to protect them from nicks or scrapes. Another trick you can try is attaching the legs to the piece of furniture to which it belongs.
As for the rugs, make sure you vacuum them first (and maybe even dry clean it). Then, roll them and secure them with tape or rope. If you prefer, you can also cover them with an old sheet or a moving blanket for extra protection.
Step 9: Label and Secure the Boxes
Every time you fill up a box with your stuff, label it on all sides. You can simply write ‘bedroom’ on all the boxes. Or, you can label each box with the name of whatever’s inside: linens, shoes, drawers, etc.
Personally, I recommend labeling boxes as specifically as possible. Chances are you’ll be pulling things out of boxes for the next couple weeks. Still being able to find something quickly even when half your stuff is still in boxes will make you feel like a superhero.
Once all the boxes have been labeled, it’s time to close up the boxes with some packing tape. Run the tape several times over the flaps to ensure they remain closed during transit.
Step 10: Arrange Everything in the Moving Truck
If you hire professional movers, they’ll know the right way to arrange all your stuff. Plus, they’ll use the proper supplies for securing your belongings, such as rope and tie-down straps.
Another option is to move everything yourself, especially if money is tight. You can always ask friends and family to lend you a hand on the big day.
A Final Note
Learning how to pack up your bedroom for moving can be overwhelming. Use our guide to help you pack your belongings safely and efficiently
So, make a plan and stick to it. This way, you can stop worrying about the move and start planning for your exciting future in your new home!

